Well today is the day the Stampin' Up! Holiday Catalogue is live! Yay!!
Have a look and do let me know if you would like me to place an order for you.
I have started up a Facebook page called Getting Crafty With Jude.
Please send me a request to join our group to see what I have been making and what my group of lovely crafty ladies have been doing in our woorkshops.
We would love for you to join us there.
Judy
Thursday, September 1, 2016
Monday, August 1, 2016
Double Z Cards
Ok so the new Holiday Catalogue is just around the corner now - starts in September!
Are you excited, because I am.......... Lots of Christmas projects and classes to come very soon.
I have been having a great time making Double Z Cards.
Here are the ones we made in my July Workshop

The ideas are endless as you will see on both Pinterest and You Tube, I did case a couple of these cards from there.
Talking of casing. These motorbike cards are designed by Dawn Griffith. How great are they?
Thanks for sharing Dawn they are awesome! These feature the One Wild Ride stamp set.


 Seaside Shore stamp set

 Another One Wild Ride stamp

Are you excited, because I am.......... Lots of Christmas projects and classes to come very soon.
I have been having a great time making Double Z Cards.
Here are the ones we made in my July Workshop

The ideas are endless as you will see on both Pinterest and You Tube, I did case a couple of these cards from there.
Talking of casing. These motorbike cards are designed by Dawn Griffith. How great are they?
Thanks for sharing Dawn they are awesome! These feature the One Wild Ride stamp set.


and now for a few more! Very cute Stampin' Up! Baby Bear stamp set and some 2016-1018 Incolour Designer Series Paper in Dapper Denim.

 Seaside Shore stamp set
 Another One Wild Ride stamp
and some Neutrals Designer Series Paper. I just love this colour combo!
as I said the ideas are endless!
I have a tutorial on my TAMS page for a 5" x 7" card, the green and white one from our workshop, if you are interested in trying one

I adore the Mint Macaron colour combined with some Sweet Sugarplum. Also love, love, love the Grateful Bunch stamp set which also has a coordinating Blossom Bunch Punch.
Hope you have as much fun as I did making some of these! They are really easy, I promise.
Until next time
Judy
Thursday, July 7, 2016
Bonus Coupon during July and Thoughtful Branches

Take advantage of this fabulous offer! Spend this month an redeem your coupons from 2nd to 31st August 2016. Your coupons will be emailed to you!
A good way to earn your $9 Bonus Coupon is to buy this limited time offer Thoughtful Branches!
This bundle is only available 2nd to 31st August 2016
Photopolymer Stamp Set is Item 143539 $47.00 The Beautiful Branches Thinlit Dies Item 143538 are $54.00 or, the best way to buy is the Bundle where you save 10% Item 144328 $90.75


Until next time!
Judy
Wednesday, July 6, 2016
Floral Phrases Bundle

Don't you just love the Floral Phrases Stamp set Item 141767 Clear $31.00AU and Item 141764 Wood $44.00AU and the Detailed Floral Thinlets Dies Item 141482 $49.00AU? Why not take advantage of the Bundle and save 10%! For Clear Item 142355 $72.00AU and for Wood Item 142354 $83.50AU
Below is a card I made for a family 50th Wedding Anniversary. I also made a little Night of Navy pocket and glued that to the inside of the card with a Gold Class Movie Gift Card enclosed.
The Large Numbers Dies were just perfect for this occasion too. For this card I cut one set out of our lovely Gold Foil Card and one out of Gold Glimmer Paper. Then they have been offset slightly using a few Glue Dots to really make the 50 pop.


Just a reminder when using your Detailed Thinlits to use your new Big Shot Platform and Precision Plate to get a lovely crisp cut. It really does make a difference!
I made a lovely box using my Envelope Punch Board and then a matching Belly Band to finish it off.

Here is one last card in Sweet Sugarplum. Lots of variations, only limited by your imagination........
Until next time
Happy Stampin!
Judy
Monday, July 4, 2016
Best Birds Bundle
Here is a card I made with the Best Birds Bundle. How sweet are these little birds?


This is what you get in the stamp set.
Buy the bundle and save 10%! Item 142315 $73.75 You really have to buy the bundle to get the lovely Framelits so you don't have to fussy cut them all.
Until next time
Judy
Tuesday, June 28, 2016
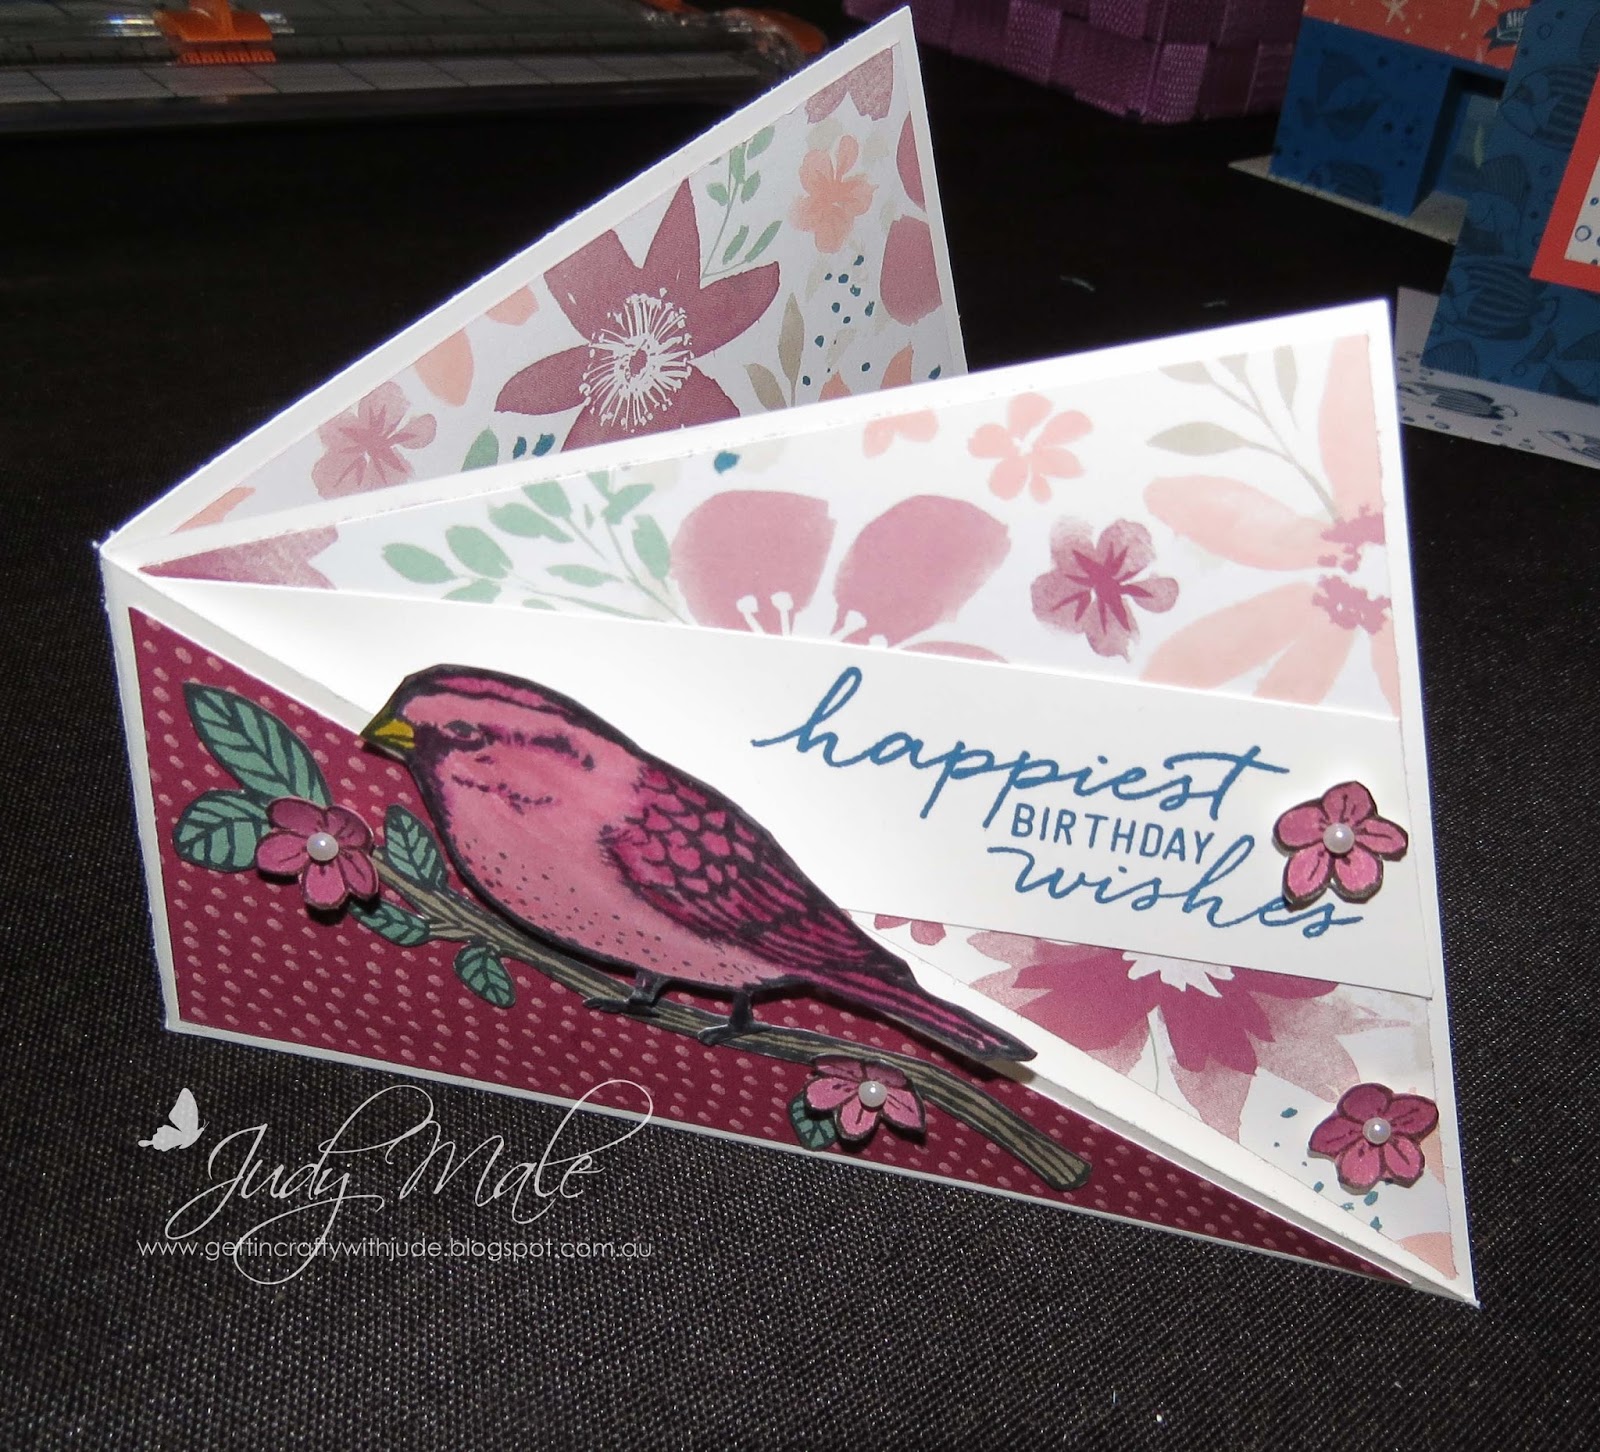
Twist Fold Cards
Here are a few more Twist Fold cards, these are whole lot of fun, so much you can do with them!
I've used Best Birds stamp set and Blooms & Bliss Designer Series Paper for this one.
For instructions please go to my TAMS page http://www.thesearemystamps.com/cards/twist-fold-card-stampin-up


And another.... Using Sweet Cupcake and the new 2016-2018 In-colour Designer Series Paper Stack


and wait there is one more!
I uses the Love and Affection stamp set for this last one.

As i said earlier these are fun cards to do.
We are having my first Team Meet here today and the girls will make these cards. I'm really excited to show them.
If you missed the instruction for this card here it is again on my TAMS page.
Until next time
happy stampin!
Judy
What fun these Twist Cards are! Something new I've discovered thanks to one of my class members. Thank you Janet G for showing me this new type of fold. Well, new to me anyway.
For instructions please go to my TAMS page http://www.thesearemystamps.com/cards/twist-fold-card-stampin-up


For instructions please go to my TAMS page http://www.thesearemystamps.com/cards/twist-fold-card-stampin-up
If you would like to order any supplies, hit the Shop Now button! or contact me via my web page.
Thanks for looking at my blog!
Until next time
Judy
For instructions please go to my TAMS page http://www.thesearemystamps.com/cards/twist-fold-card-stampin-up


You can pop a gift card or cash inside the pocket for an extra special present!
If you would like to order any supplies, hit the Shop Now button! or contact me via my web page.
Thanks for looking at my blog!
Until next time
Judy
Friday, June 17, 2016
June 2016 Workshop
Getting projects ready for my June Workshop this Sunday.
Here are the cards we are making:
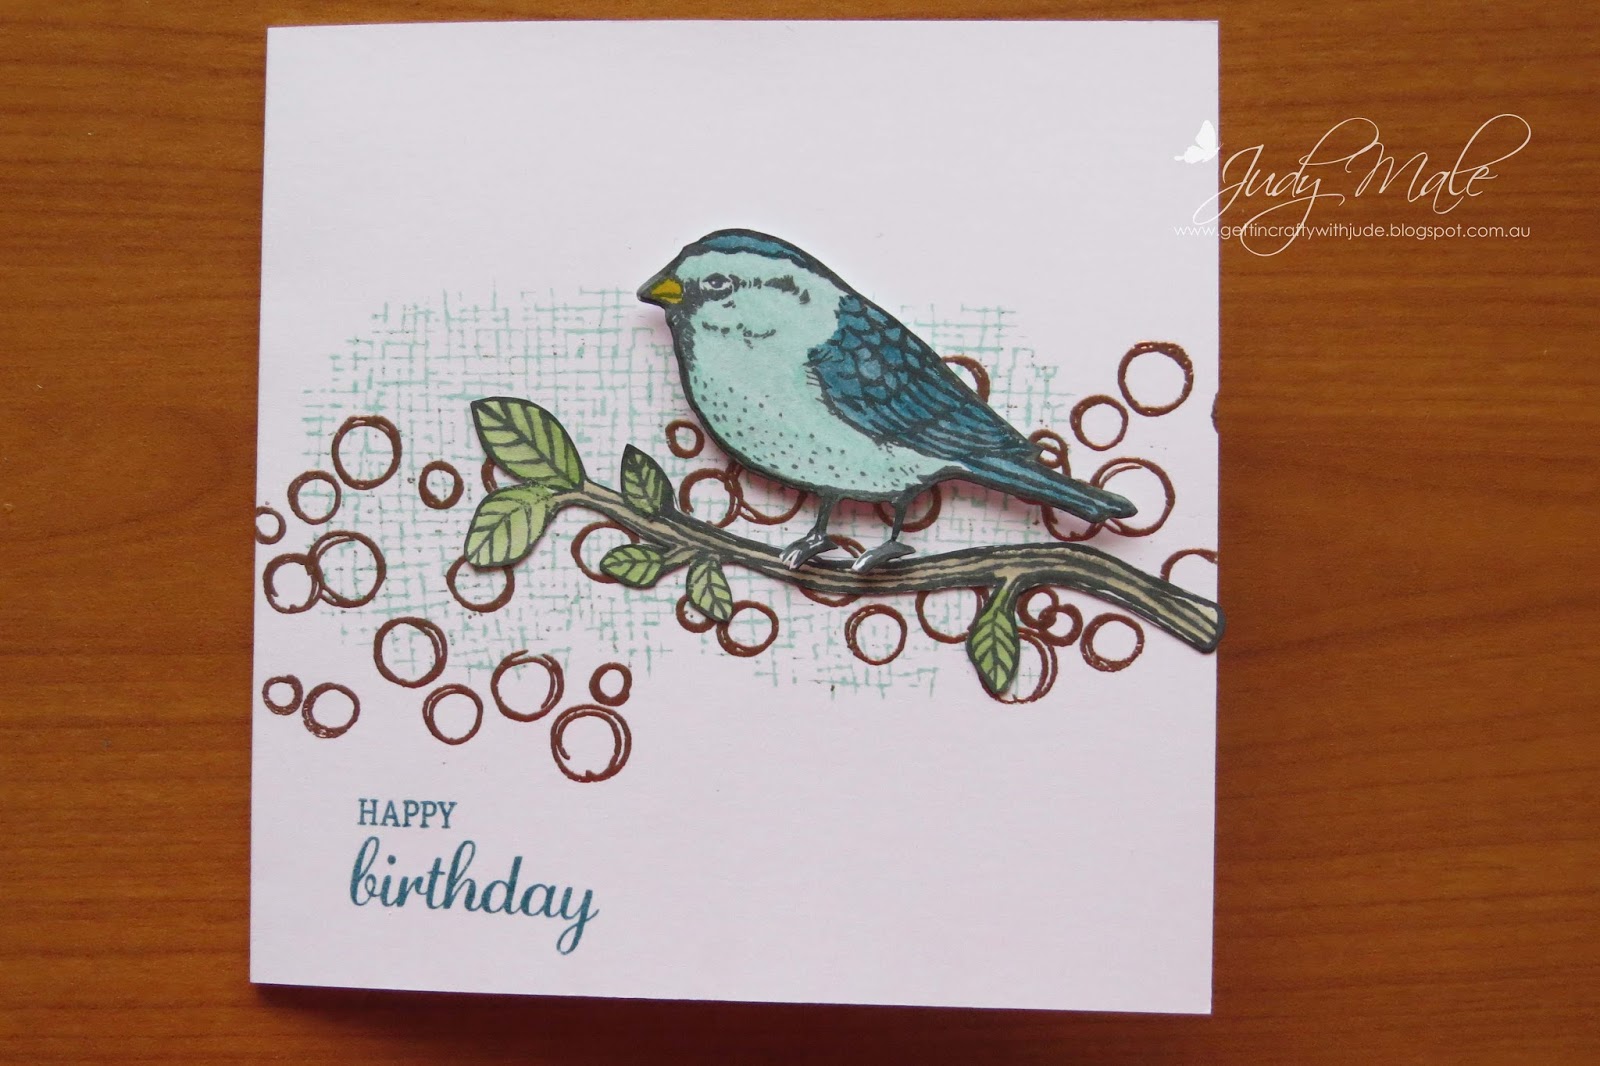
 Love the new stamp set Best Birds! This pretty bird is a great addition to our stamps.
Find instructions here

The second card is using the stamp set Sitting Here
Find instructions here

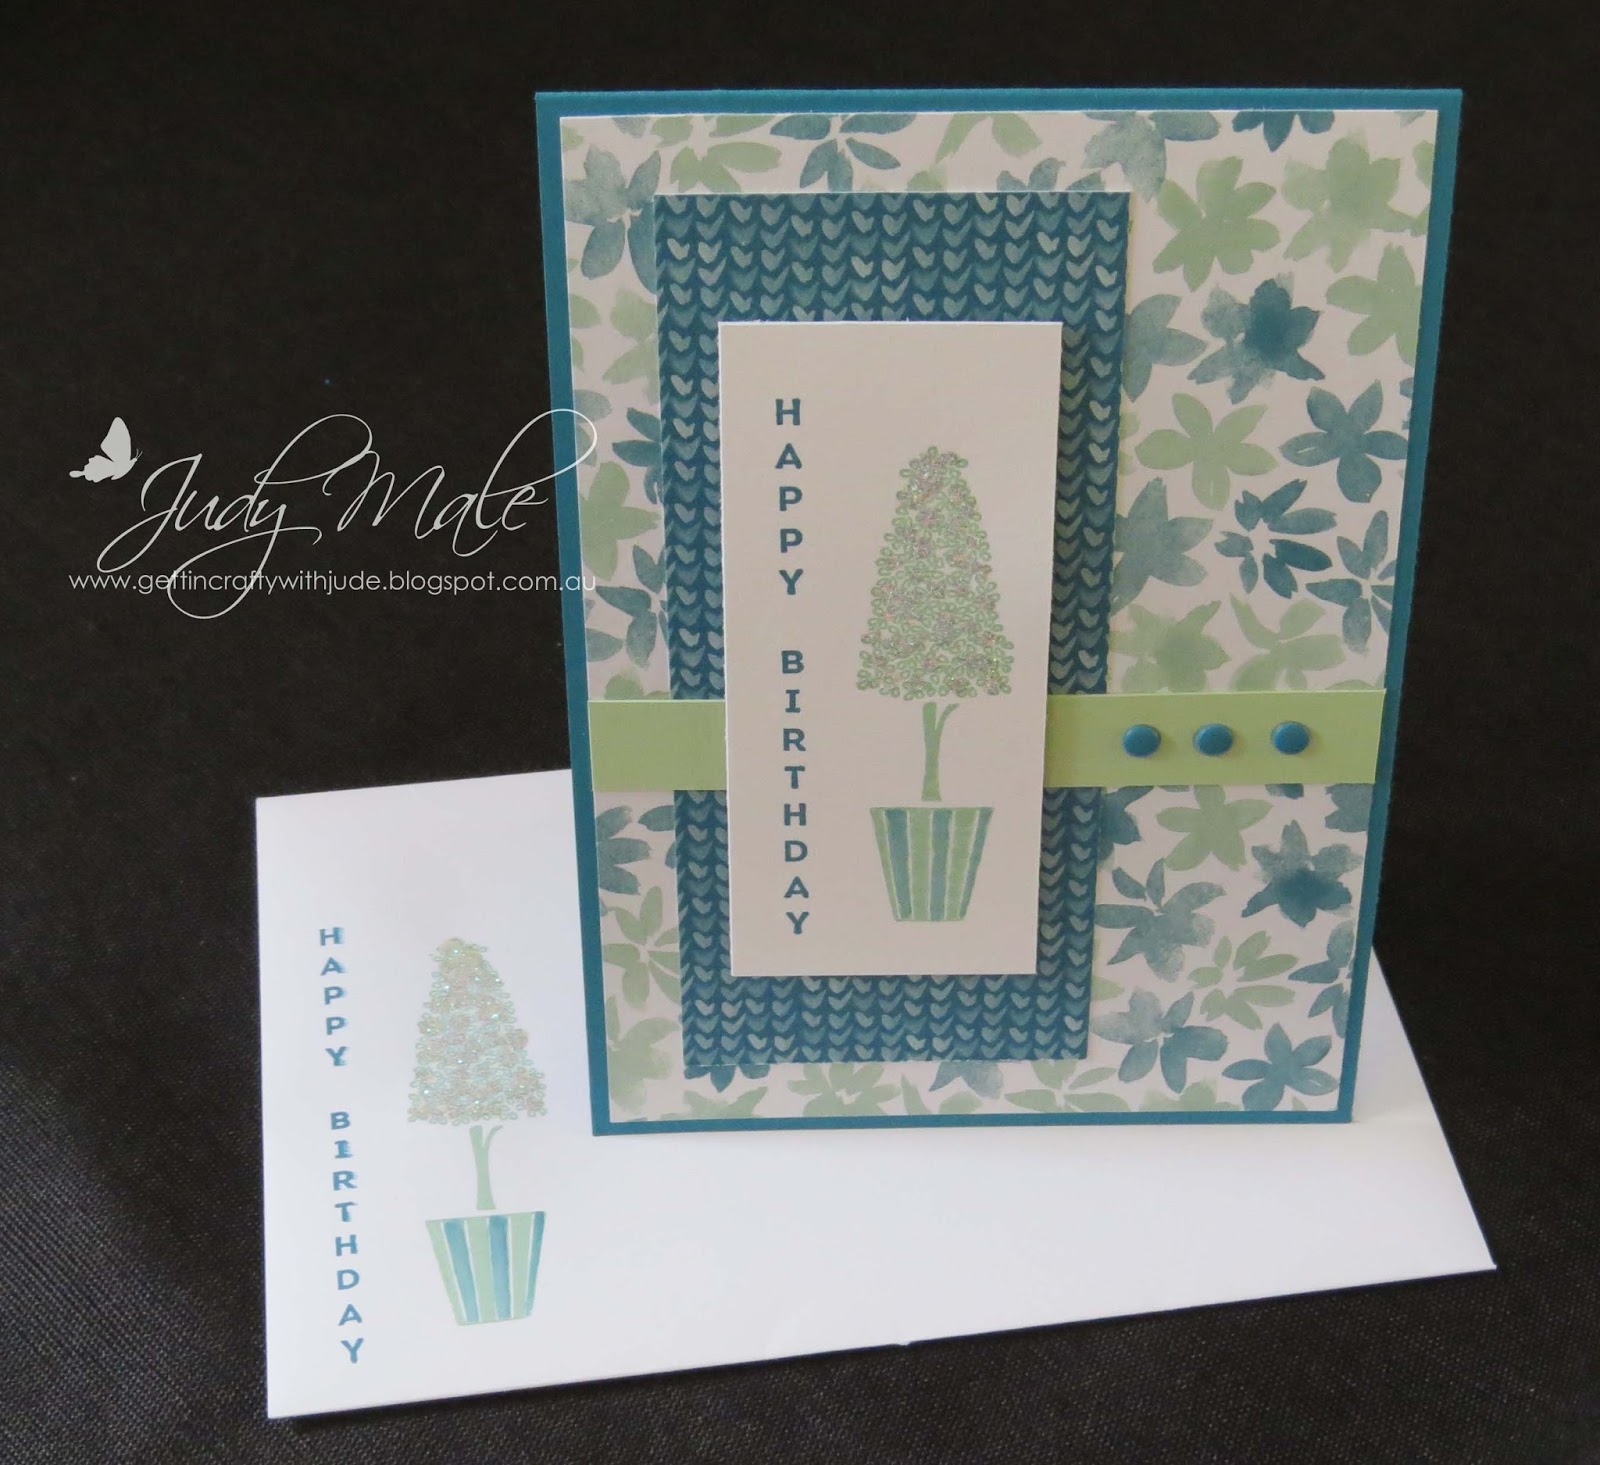
For the third card I have used the new Vertical Greetings stamp set and the beautiful new Designer Series Paper Bliss & Blooms
A vertical set of greetings has been long overdue!
Follow the link for more instructions
Well I have more to do to get ready for class on Sunday so....
Until next time
Judy
Here are the cards we are making:
Find instructions here

The second card is using the stamp set Sitting Here
Find instructions here
For the third card I have used the new Vertical Greetings stamp set and the beautiful new Designer Series Paper Bliss & Blooms
A vertical set of greetings has been long overdue!
Follow the link for more instructions
Well I have more to do to get ready for class on Sunday so....
Until next time
Judy
Monday, June 13, 2016
Baby Bear for Myah
I've had a wonderful time playing with the beautiful new Baby Bear stamps from Stampin' Up!
I needed to make a special card for a new baby Myah whose parents are family friends Mel and Dan. I couldn't find any Stampin Up papers that I loved for this project so I used a piece of paper from my before SU stash. What do you think? Of course I had to make a special envelope card with my Envelope Punch Board and then wrap the present to co-ordinate too. Fortunately there are lots Stampin' Up! products that I could use to match this paper.

Ok so then I got to thinking that I now have to create a full Stampin' Up! version of this card that I will do a workshop/class on very soon.
I don't know what this fun fold is called, I learnt it recently at a Craft Show.
Here is the second version

A side view to this lovely card and it stands up really well too.


I needed to make a special card for a new baby Myah whose parents are family friends Mel and Dan. I couldn't find any Stampin Up papers that I loved for this project so I used a piece of paper from my before SU stash. What do you think? Of course I had to make a special envelope card with my Envelope Punch Board and then wrap the present to co-ordinate too. Fortunately there are lots Stampin' Up! products that I could use to match this paper.

I don't know what this fun fold is called, I learnt it recently at a Craft Show.
Here is the second version


I love it so much and I could picture the new Baby Bear stamp set and our Botanical Builder Flowers to compliment this card beautifully. Sometimes my mind can see clearly a lovely card, and this is my completed creation. Must say I do love this!
I tried a few colour combinations of the bears and this one uses Pink Pirouette as the layer 1, Pretty In Pink as layer 2 (this colour is retired now but you could use Blushing Bride instead) The new In Colour Sweet Sugarplum as layer 3. I like to reverse the layers when stamping, I find it easier to line up the layers starting with the darkest colour first. If you are not aware, it is a three step stamp set. I have given the lovely bow a coat of clear Wink of Stella for a little sheen.
Now I had a few bears left over so I created this next card with the left overs. The 3rd layer of the bear is Rich Razzleberry.

Now to decide what other new stamp set I am going to play with tonight!! Decisions, decisions!
I've been working on a tutorial for the fun fold card but it wasn't easy to write, so I've done my best for you if you want to try it. I will try to improve the instructions soon.
Here is my TAMS link as it is now
Until next time
Judy
Wednesday, June 8, 2016
My New Craft Room Reno
Hi everyone!
It has been a very exciting time for me. My Husband Tony and I have been doing a bit of reno work to freshen up our home. We had a formal lounge room which we never used, well hardly, and a family room where we watched tv and I had a trestle table set up as my craft table. So my dear hubby suggested that we have the formal lounge as our tv room and convert the family room in to my very own craft room!
Here are some photos of the room so far


Lots of space for my stamps and other supplies

Another view with the table set up

Double desks side by side and lots of lovely drawers too!
You can just imagine how happy I am, can't you? I held my Catalogue Launch here last Sunday and I was so happy with the way the day turned out.


 I still have lots of sorting out when I get some spare time. But, at least I now have a designated room to be able to get it done! My launch was a real success. I am very happy to have some new ladies who would like to join in on the monthly workshops here in the future which is just awesome!
Ok well that's it for today, I'll be back real soon to share some projects from the new catalogue with you.
Until then
Happy stampin
Judy
It has been a very exciting time for me. My Husband Tony and I have been doing a bit of reno work to freshen up our home. We had a formal lounge room which we never used, well hardly, and a family room where we watched tv and I had a trestle table set up as my craft table. So my dear hubby suggested that we have the formal lounge as our tv room and convert the family room in to my very own craft room!
Here are some photos of the room so far

Table set up for Make and Takes at my Catalogue Launch


You can just imagine how happy I am, can't you? I held my Catalogue Launch here last Sunday and I was so happy with the way the day turned out.


Ok well that's it for today, I'll be back real soon to share some projects from the new catalogue with you.
Until then
Happy stampin
Judy
Monday, May 9, 2016
New 2016-2018 In-colours!
Well not much longer now until the new Stampin' Up! Annual 2016-2017 Catalogue is available to you! My box of pre order products arrived today so I am busy making up some sample cards for my Catalogue Launch on 5th June.
I thought I would share a sneak peak of the beautiful new 2016-2018 in-colours with you.

 Don't you just love them?
Sweet Sugarplum, Dapper Denim, Peekaboo Peach, Emerald Envy and Flirty Flamingo!
I sponged on the colours then cut out my butterflies using the Bold Butterfly and Butterflies Thinlits.
On the top card I then did the Bokeh technique and used a few White Perfect Accents to make the card pop!
Well I had better get back to creating some more cards to hopefully inspire you.
Until next time
Judy
I thought I would share a sneak peak of the beautiful new 2016-2018 in-colours with you.


Sweet Sugarplum, Dapper Denim, Peekaboo Peach, Emerald Envy and Flirty Flamingo!
I sponged on the colours then cut out my butterflies using the Bold Butterfly and Butterflies Thinlits.
On the top card I then did the Bokeh technique and used a few White Perfect Accents to make the card pop!
Well I had better get back to creating some more cards to hopefully inspire you.
Until next time
Judy
Thursday, April 7, 2016

This card is for my Great Nephew Karmichael. The stamps are not all Stampin' Up! but the cardstock and inks are and so is the lettering for his name and of course the large number 3 is a Stampin' Up! Die. I just love, love, love the Stampin' Up! Large Numbers Framelit Dies and co-ordinating stamps called Number of Years, although I have only used the dies in this instance. I have used them on so many birthday cards and hope they never ever retire! I used Back To Basics for his name. The nautical stamp set used I found at a little craft store in their sale bin. It was so cheap and I have made a few cute little cards from it. I used a scrap of retired Stampin' Up Designer Series Paper for the main sail and coloured in the boats with my Stamp Write Markers and did a little water colouring using my Aqua Painter. Colours used are Night of Navy, Real Red, Marina Mist, Crushed Curry and then Pool Party for the water.
Our Weekly deals are going on April 19th!! After that Stampin' Up! will do some specials periodically instead of weekly. Keep an eye on my Online Store for any specials here and simply click on the shop now button.
Hope he likes his card!
Until next time
Judy
Sunday, April 3, 2016

Hello, what a beautiful Autumn day it is here in Mornington!
I know it's spring on the other side of the world but our day might just match yours today.
A dear friend had a little girl recently so I thought I would share the card I made for her new baby Alice.
I love dots and this is quite evident here!
The background in Blushing Bride cardstock has been embossed with Stampin' Up's Large Polka Dot Embossing Folder.
The coloured dots on the card were done using a sponge dauber and just randomly placed using Blushing Bride, Pretty In Pink (retired) and Pistachio Pudding (retired) You could easily substitue other colours.
The baby growsuit is from the stamp set Made With Love and the butterfly is from Butterfly Basics. I did the baby's name on the computer and used the RGB codes to colour match the Project. A few pearls in the centre of the butterfly which was firstly heat embossed in White Embossing Powder. The tiny heart is also stamped from Made With Love in Blushing Bride and then gone over in a stamp write marker to add a bit of interest. The hearts and border of the suit have some Wink Of Stella over them to give a bit of a shimmer. A couple of Candy Dots in Blushing Bride to finish it off! This card was inspired by a card I saw on Pinterest by Ginger Toivonen of gingerstamps. Thanks Ginger!
Until next time!
Judy
Tuesday, March 29, 2016
Swallowtail Butterfly
We did the Bleaching Technique and got some awesome results!
Firstly we stamped the butterfly with Versamark on to Tempting Turquoise Cardstock then heat embossed in black embossing powder. Using an Aqua Painter filled with bleach we then bleached out all of the butterfly. In some areas I used more bleach than others to get a variant of shades. I then coloured in using my Stamp Write Markers, Tempting Turquoise and Night of Navy, Marina Mist and then went over with the Wink of Stella Pens in both Clear and Gold.

Below is another card I made with the retired Stampin' Up! Enfrancais background stamped in versamark only. This gives the watermark look which is quite a subtle effect.
 |
 |
Again I heat embossed the image in black to start with, then using sponge daubers I coloured in using Real Red, Pumpkin Pie and Daffodil Delight inks.
If you would like to order this beautiful stamp or any of the products I have used, please to to my online store by clicking the Shop Now button, or contact me and I will be happy to place the order for you.
 |
| .Hope you have some fun with the Swallowtail |
Sale-a-bration freebies are still available until March 31st so not much longer! Take advantage of choosing a free product for every $90AU you spend before postage.
Until next time
Happy stampin
Judy
Subscribe to:
Posts (Atom)